
Packing Your Carry-On So Security Doesn't Slow You Down
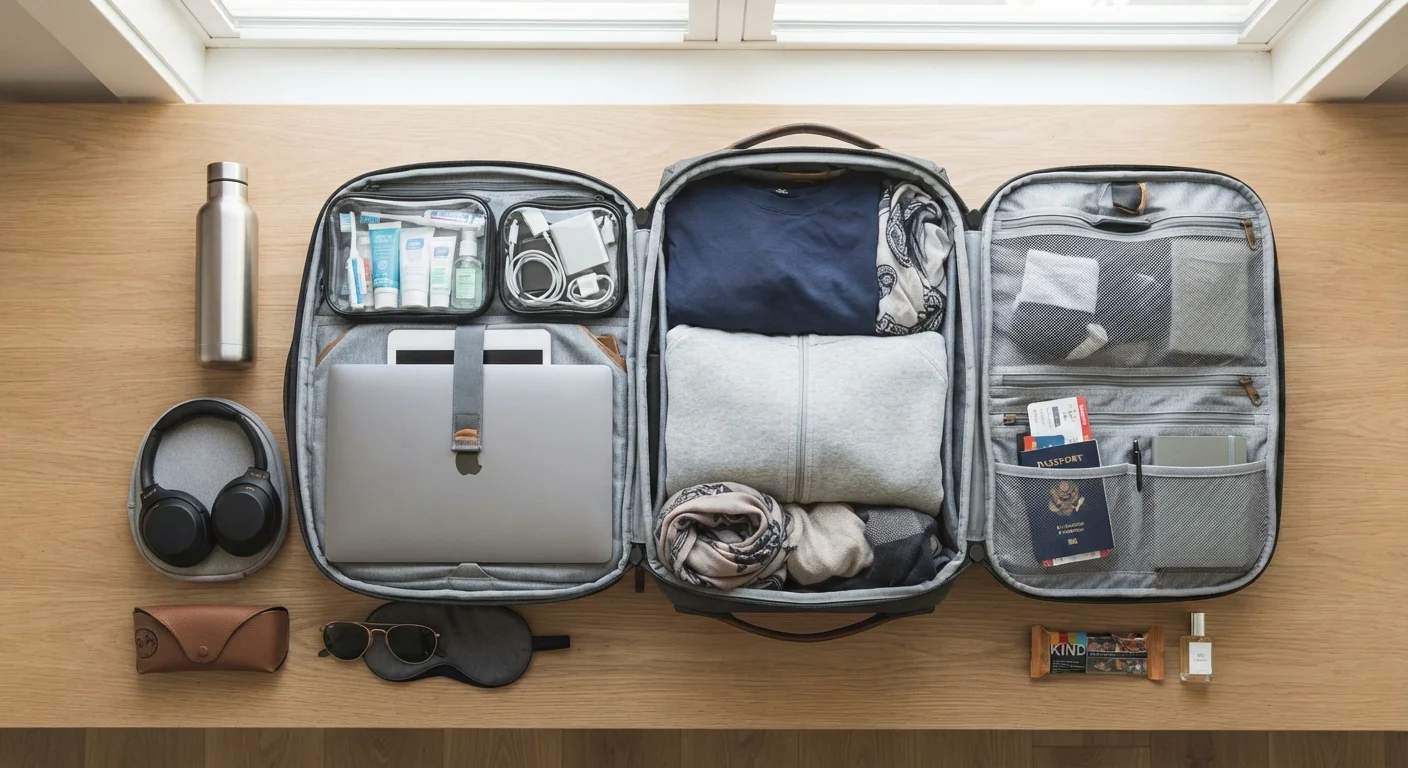
Photo credit: ExploreRoute.net | Travel Made Simple
In this article
How you pack your bag affects how long you spend at the security checkpoint. These organisation strategies help screeners clear your bag on the first pass.
Key Takeaways
- X-ray screeners flag bags with dense, overlapping layers — packing in clear zones prevents that.
- Liquids and electronics must be instantly accessible, not buried under clothing or gear.
- A consistent packing system you repeat every trip is faster than improvising each time.
- Trusted Traveler programs reduce checkpoint friction but don't substitute for smart packing.
- How you organize your bag affects not just your speed, but the flow of everyone behind you.
Why Bag Organization Directly Affects Screening Speed
Airport security checkpoints use X-ray imaging to assess bag contents without opening them. What screeners see on a monitor is a two-dimensional density map — overlapping items at similar depths become indistinguishable from one another. A bag that is logically organized from a packer's perspective can still look like visual noise to a screener if categories are intermixed and layers are dense.
The practical consequence: a bag that triggers image uncertainty gets pulled off the belt for a physical inspection, adding time for you and slowing the lane for everyone else. This isn't about following arbitrary rules — it's about making your bag readable to the technology being used to clear it. Strategic packing is a form of communication with the checkpoint process.
If you're still deciding whether to check a bag at all, understanding the real trade-offs between carry-on and checked luggage is worth doing before you commit to a packing strategy.
What you will need
What You'll Need and How to Approach It
The tools that make checkpoint-friendly packing possible are inexpensive and reusable. None of them require purchasing a new bag — they work with what you already carry.
Clear quart-sized zip-top bag
Holds all liquids, gels, and aerosols in a TSA-compliant, immediately removable pouch.
Packing cubes or flat pouches
Separate clothing from electronics and personal items so each category is visually distinct on X-ray.
Dedicated laptop sleeve or padded compartment
Keeps the laptop isolated so it can be removed and replaced quickly without disturbing other contents.
Small cable organizer pouch
Bundles charging cables and adapters to prevent them from creating tangled, ambiguous X-ray images.
Dense Packing Triggers Secondary Screening
Overstuffed bags create visual clutter on X-ray monitors that screeners cannot easily resolve. When an image is ambiguous, the bag gets pulled for a manual search — adding several minutes to your wait and creating delays for other passengers. Leaving some space and separating item categories is not optional if speed is your goal.
Once you have your materials ready, follow the steps below in sequence. The order matters: packing your electronics and liquids last means they stay accessible for removal, then return, without disturbing the rest of the bag.
Step-by-Step: Packing for a Fast Security Pass
Group every item into three categories before it enters the bag
Divide everything you plan to carry into three distinct groups: liquids (toiletries, gels, aerosols), electronics (laptop, tablet, large battery packs, cameras), and everything else (clothing, books, snacks, documents). Do this on a flat surface before you pack a single item. This step takes two minutes and determines how quickly your bag moves through the X-ray machine.
Pack your liquids bag last and place it in the most accessible outer pocket
Fill your clear zip-top bag with all liquids, seal it, and set it aside. It should be the last thing you place into your carry-on and the easiest thing to reach. The ideal location is a dedicated outer pocket or a top-access zipper that opens without disturbing other contents. At the checkpoint, you'll need to place this bag in its own tray — a motion that should take under five seconds.
Position your laptop so it can slide out without unpacking anything else
At standard TSA checkpoints, laptops must be removed from their bag and placed in a separate tray. Your laptop should sit in a sleeve or compartment that opens independently — not inside a packing cube wedged between clothes. Most modern carry-ons have a dedicated laptop compartment with its own zipper access; use it. If yours doesn't, place the laptop flat at the top of the main compartment facing up.
Use packing cubes or pouches to create visible, separated layers
X-ray images become harder to read when items from different categories overlap. A charging cable draped across a toiletry bag draped across a book creates visual noise that may prompt a secondary check. Packing cubes solve this by compressing each category into a clean rectangular block. Screeners can identify clothing as clothing, electronics as electronics, and move on. Even without packing cubes, keeping categories physically separated — electronics on one side, clothing on the other — meaningfully reduces ambiguity.
Remove potential flag items from pockets and secure them before the checkpoint
Metal items, large battery packs, and dense clusters of cables routinely trigger additional screening. Before you reach the checkpoint, transfer items from your jacket pockets and pants pockets into your carry-on or personal item — keys, coins, belts, and phones. This eliminates a secondary tray and a second pass through the scanner. For food items like whole fruit, granola bars, or wrapped sandwiches, placing them in a single area of the bag helps screeners identify them without a manual check.
For more on what actually drives screening decisions versus common misconceptions, see our piece on security myth vs. real screening.
Repack in a deliberate sequence so the next checkpoint is equally fast
After clearing security, resist the urge to shove everything back in randomly. Take 60 seconds to return each item to its designated zone: laptop back in its sleeve, liquids bag back in the outer pocket, cables back in their pouch. A bag that was fast to unpack at checkpoint one will be equally fast at any connecting airport. This discipline pays dividends on multi-leg itineraries. For a complete picture of what to have ready once you're through security, the in-flight comfort checklist covers what to access immediately after boarding.
Use the Same Packing Layout Every Trip
Muscle memory is a real advantage at security. If your liquids bag always lives in the same outer pocket and your laptop always sits in the same sleeve, you can unpack and repack the conveyor tray in under 30 seconds. Inconsistency costs you time — repetition reclaims it.
TSA Liquid Rules Still Apply
All liquids, gels, and aerosols must be in containers of 3.4 oz (100 ml) or less, placed in a single, clear, quart-sized zip-top bag. This applies at every standard TSA checkpoint regardless of how neatly you pack. Verify current rules on the TSA website before you travel, as policies can change.
What to Expect After You've Packed This Way
A well-organized carry-on typically clears X-ray on the first pass. Your tray sequence at the belt becomes a routine: bag goes flat, laptop comes out cleanly, liquids bag lifts out in one motion. The entire unbag-and-tray process should take under 30 seconds when you've practiced your layout.
For first-time travelers or those unfamiliar with how the full checkpoint sequence works, the complete airport security walkthrough explains every phase from queue to collection belt in detail. Pairing that guide with the packing approach above gives you end-to-end preparation for the checkpoint experience.
No packing system eliminates all variables — screener judgment, equipment sensitivity, and checkpoint-specific rules can vary. These strategies reduce friction and maximize the likelihood of a single-pass clearance, but they don't guarantee it. Always allow adequate time before departure regardless of how efficiently you've packed.

Author
Smart Air Travel Editorial Team
Smart Air Travel Editorial Team is the collective byline for our editorial team and contributor network. Articles published under this byline or an editorial pen name are researched, written, and reviewed according to our editorial standards for clarity, consistency, and independence before publication.
View all articles →